Pro tip: don’t declare that your blogging delinquent streak is over right before you move. Sure, we only had to lug all of our possessions about two miles, from one segment of stroller Brooklyn to another—but the ensuing weeks have been so filled with unpacking, organizing, and arguments regarding things I never in my life thought I’d even have an opinion about (paint colors! Lighting fixtures! Are you miming shooting yourself in the head with your index finger yet?) that I’ve hardly had any time to cook, let alone write about that cooking on the internet.
Before we left the old place, though, I did mark the occasion—and a certain long-suffering spouse’s birthday—by baking something special. Did all of our wine glasses make it to the new apartment unscathed? No. Did this pie? Yes.

Before we go any further, I should clarify something: technically, the above confection is not a key lime pie. (One might even call it a key lie pie, if one were the sort of person to never leave a pun unintended.) The limes I used are the standard grocery store type, which are technically of Persian origin; legit Key limes, as in the variety that comes from Florida, are expensive and tiny (so you need to buy more to get the same amount of juice), and they’re often not even that good, because they usually don’t actually come from Florida anymore.
Given all that, plus my grandmother’s well-documented love of convenience ingredients, I figured I could cut a corner by nixing the Keys for more easily-sourced limes.
What I didn’t know then is that juicing those limes would end up being just about the most time-consuming part of this recipe. I had no idea that key lime pie (or, you know, regular lime pie) was so dead simple to make, probably because its traditional key ingredient—sweetened condensed milk—eliminates the need to carefully craft a custard from scratch. All you’ve got to do is mix the filling ingredients together, dump them into a prepared crust, and then prepare your topping of choice as it bakes; left to my own devices, I would’ve used whipped cream, but Nonnie’s meringue may have actually made a convert of me. (I was scared to make it because I was certain I’d screw it up; as it turns out, it’s not easy to screw up!)
In conclusion: screw complicated pie crusts, and homemade but gloopy fillings, and key limes. Just make this, and be happy. I know we were—at least, after we stopped yelling about where to put the bookshelves.
Key Lime Pie
6 eggs, separated [This is way more eggs than the typical key lime pie recipe calls for; it’s probably more than strictly necessary. I’m sure your pie would be delightful with just four eggs—and you wouldn’t have to contend with quite so much meringue—but if you want to really lean into the richness, use six.]
1/4 teaspoon Cream of Tartar
1/2 cup fresh lime juice
1 can sweetened condensed milk [apparently, you can make your own… but why on earth would you?]
12 tablespoons sugar [i.e. 2/3 of a cup. Don’t worry, none of that is going into the pie filling; it’s all for the meringue]
9″ baked pastry shell [Okay, so I cheated on the key limes, and I also cheated here. Rather than baking a traditional crust, I made a graham cracker crust, both in deference to my sweltering kitchen and because hey, graham crackers are delicious. I regret nothing]

Beat egg yolks slightly; blend in condensed milk; add lime juice, and blend well. Pour into pie shell and bake at 350 for 10-15 minutes to thicken filling slightly.
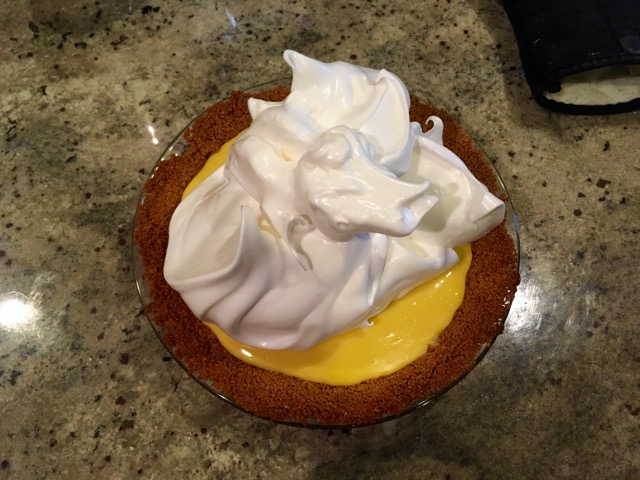
Meanwhile, beat egg whites with cream of tartar and a dash of salt until fairly stiff. Gradually beat in sugar, a tablespoon at a time, until very stiff. [How long does this take? How will you know the difference between fairly stiff and very smith? Don’t ask me; ask Martha. Martha, naturally, knows everything. I can, however, tell you that when the meringue has reached the right consistency, it’ll hold its shape easily without slumping over, like so:]

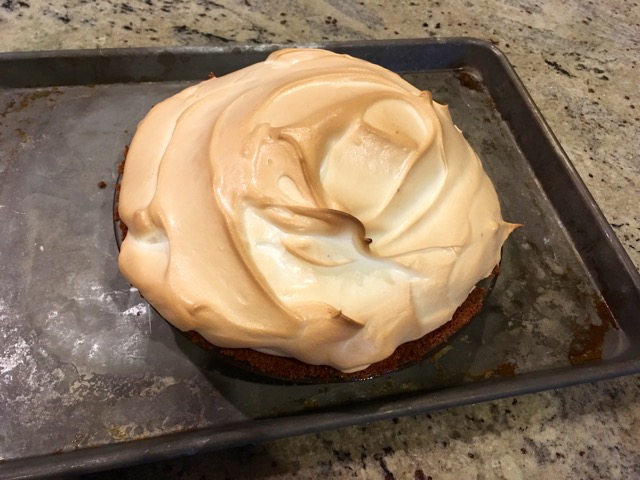
Swirl meringue onto pie, making sure edges are sealed. Bake at 400 for 5 minutes; reduce heat to 300 and bake for 15 minutes more, or until meringue is pale tan. [You will be very nervous that you’re doing this wrong and will be left with a singed mess; just keep an eye on it, and you’ll be fine, my little choux pastry.]

The verdict: Tart, creamy, and utterly satisfying, even if I had some trouble getting individual pieces to pose successfully for a photo. This is one of those pies that will refuse to cut into clean slices, unless perhaps you’ve got a steadier hand than I do. Chilling it in the fridge helped some, though the meringue still had a tendency to slide off after it’d been sliced. It was light and airy and just a tad sweet, impressive enough that I didn’t even think longingly of whipped cream while eating it—but not particularly cooperative.
Still, who could stay mad at a pie that tastes that good, and looks this beautiful when unsliced—even if inside, it’s a big old mess? And sure, while its taste will be enhanced by the hunger and exhaustion provoked by packing up your life and carrying it across a borough—I’m pretty sure you don’t need to go that far in order to enjoy it.